
This article demonstrates how to create an appointment in MyFlexLearning. This can be used to create an appointment for use in MyFlexLearning.
1. Click the "Schedule Students" Task or "Calendar" side link
3. Click on the button or click right on the calendar where you wish to schedule the appointment.
4. Choose "Add an appointment" when asked:
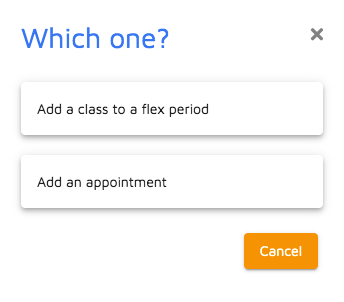
- Class name: Name the appointment. Required field.
- Date: This this the first date the class will be offered. Required field. You can choose have the appointment be "Recurring".
- Start Time: Because appointments are not restricted to a Flex Block period, set the time this appointment will start.
- End Time: Because appointments are not restricted to a Flex Block period, set the time this appointment will end.
- Class Type: Type of flex appointment this will be. (ex. Extra Help, Make-up, Office Hours). Required field.
- Class size: This is the maximum seats for this appointment. Required field.
- Location: Room where this class will be held. These rooms have been imported from your SIS. Additional rooms can be added by the Admin in MyFlexLearning. Required field.
- Description: Description of the appointment. Admins, Teachers and Students will be able to view this description.
4. Click Create.
Once created, Appointments function just like classes. You can add students to appointments (and the students will be notified by message that they are scheduled with you for that time.
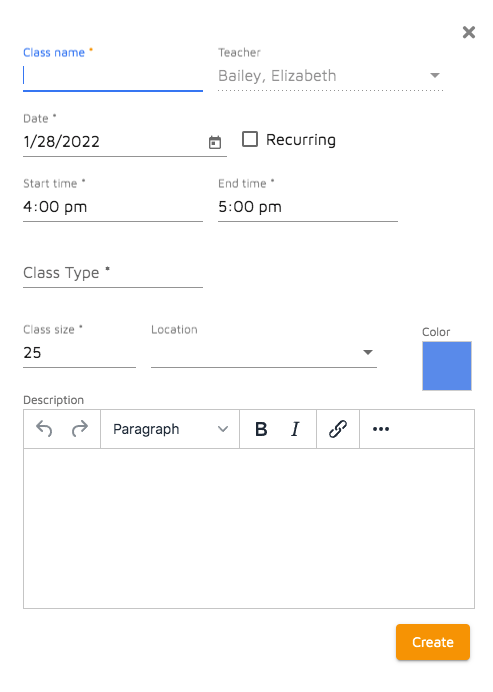
5. Appointments you create will display under the "Classes" side link:
Here is a video of this functionality:
Comments
0 comments
Article is closed for comments.