
Create Scheduled Task to Auto-Schedule Unscheduled Students
Administrators can streamline the scheduling of unscheduled students, ensuring that students are scheduled into a class before the flex period begins. This guide provides a step-by-step process for creating and viewing a scheduled task. The example below illustrates how to automatically schedule students based on their grades while also excluding students from the process with certain daily attendance codes. NOTE: These are optional tools in this process.
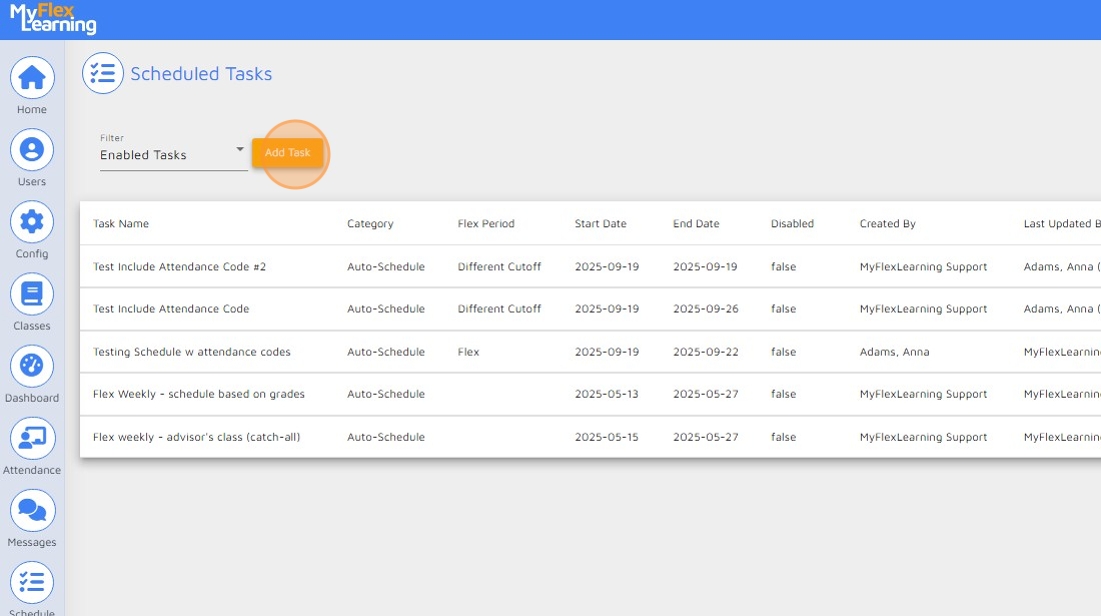
1. From the Homepage, click on Scheduled Tasks
NOTE: This feature must be enabled for your school to see this button. If you'd like to turn on this feature, please contact MyFlexLearning.

2. To create a Scheduled Task, click "Add Task"
NOTE: If you do not see the "Add Task" button, your user account does not have the ability to create Scheduled Tasks.
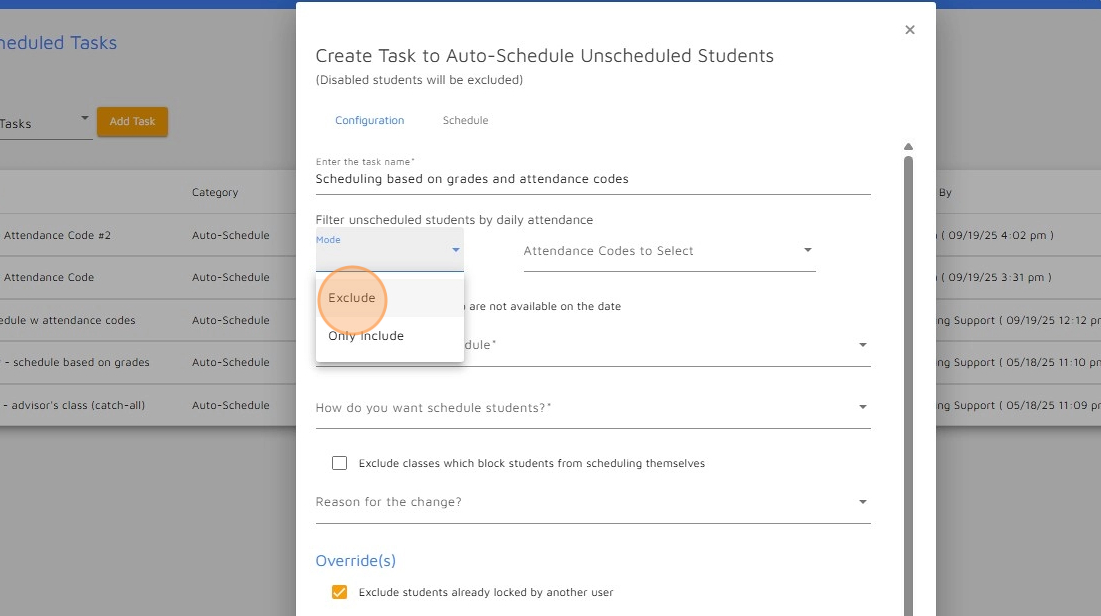
3. Give your scheduled task a name. You may notice the screen is similar to the 'Change Schedule' pop-up from the Users button when filtered to Students.
NOTE: In this example, a descriptive name has been entered as a way for the admin to easily identify from the list of scheduled tasks what this particular tasks is doing without looking at the details.

4. If you desire to filter unscheduled students by their Daily Attendance code, you can select the mode and choose Include or Exclude and then the attendance codes that would apply. This is optional
5.

6. If you have set students to not be available and wish to include/exclude them in this task, check the checkbox accordingly. If you have not set students in this manner, it doesn't matter how this checkbox is checked.

7. Select the period you are creating the Scheduled Task for, multiple periods will display if your school has multiple periods.

8. Select how you want to schedule the students.

9. If you wish to schedule students with a teacher based on their grades, you can check that checkbox and enter and enter the criteria. This is optional

10.

11. Enter a reason for the change. This is optional
NOTE: Some schools choose to enter a reason for Scheduled Tasks to know the change was made via this method vs. manually changing the student's schedule.

12. Click "Other", this school does not have any predefined reasons to select.

13. Click "Enter your reason..."

14. Determine if any of the additional checkboxes are applicable, and click Next.

15. Select a Start date for this Scheduled Task

16. Select an End Date for this Scheduled Task

17. Select the days of the week you want the job to run

18. Select the time you want this Scheduled Task to run on the days you selected.
NOTE: If you would like the Scheduled Task to run multiple times, or different times on different days, that requires multiple/different Scheduled Tasks.

19. Click "Save Task"

20. You now see the Scheduled Task you created.

21. You can Edit or Delete a Scheduled Task

22. You can view the results of a Scheduled Task by clicking on the arrow on the right.
You'll see in the Status field it indicates how many students were scheduled.
The Detail will provide a list, including errors on why students were not scheduled; which is similar to the report provided after running the "Change Schedule" from Options menu from the Users button for Students.

23. There are two filters available, the default is Enabled Tasks.

Comments
0 comments
Article is closed for comments.