
This guide explains how to unlock students from self-scheduling. If students were previously locked in bulk, they may need to be unlocked to allow schedule changes. This must be done one class at a time. Follow the steps below to complete the process.
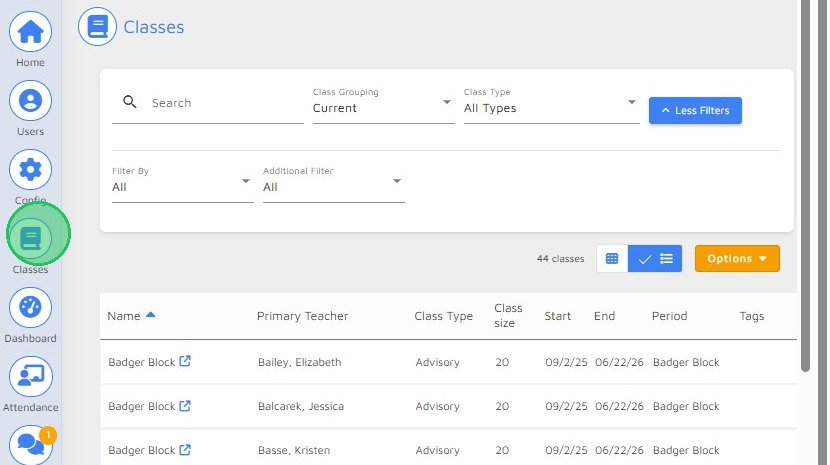
1. Click on Classes from the sidebar.
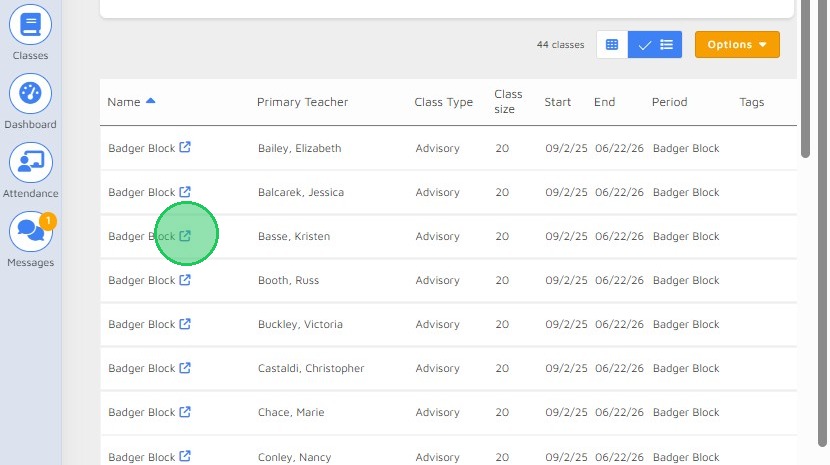
2. Click the class to get to Class Details.
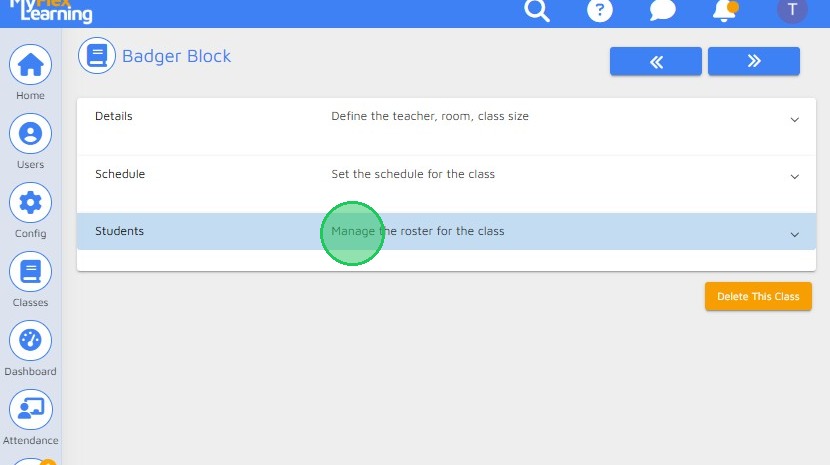
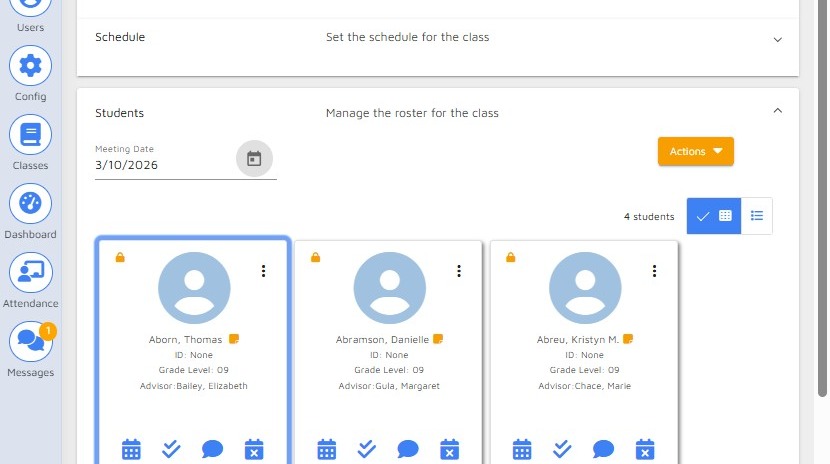
3. From Students section, click "Manage the roster for the class"
4. From the Meeting Date field, click the Calendar icon to open the date picker.
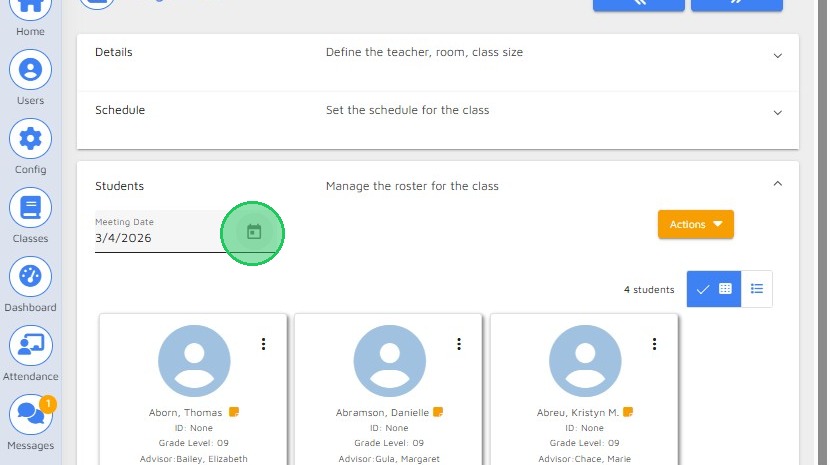
5. Select the lock date.

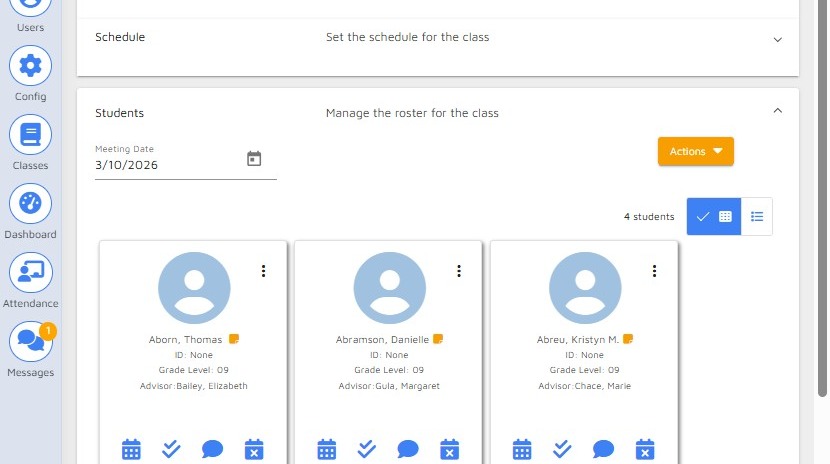
6. Notice the lock icon in the upper-left corner of the student tile, indicating that the student is locked from self-scheduling.
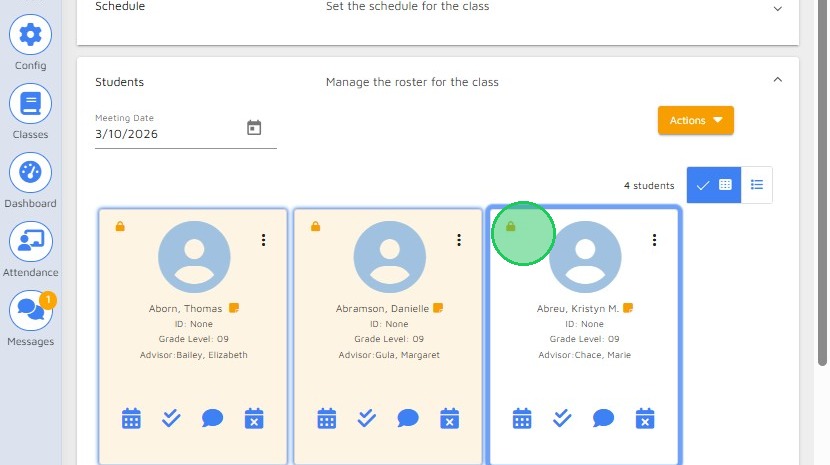
7. Select each student tile needing to be unlocked.
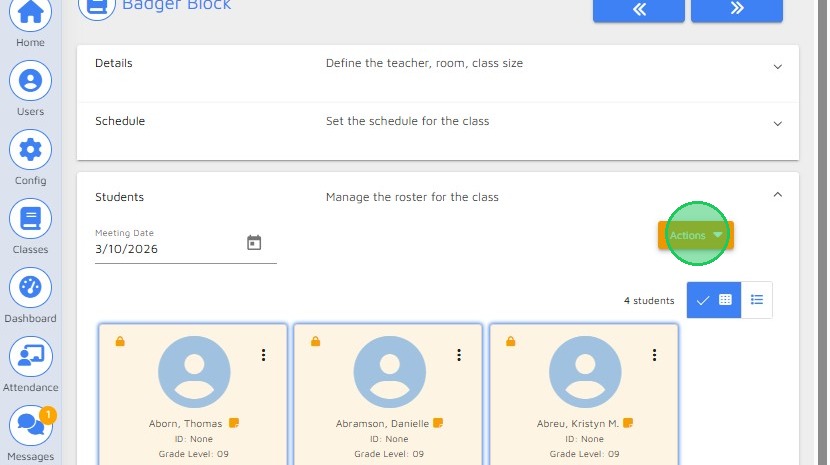
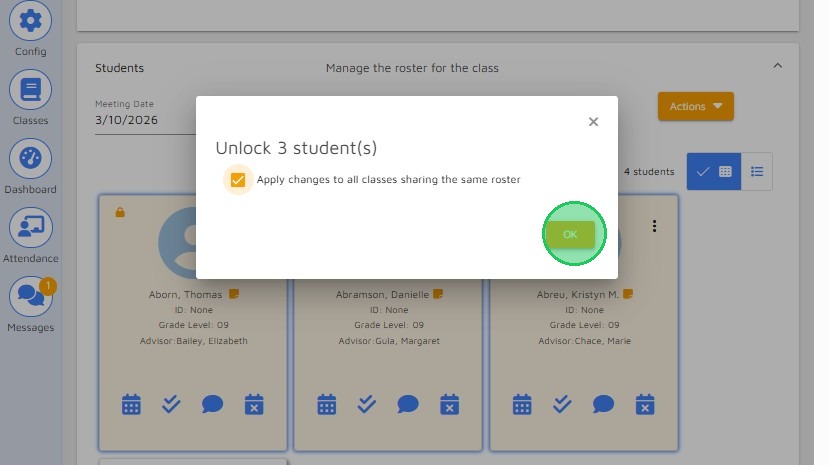
8. Click the Actions button.
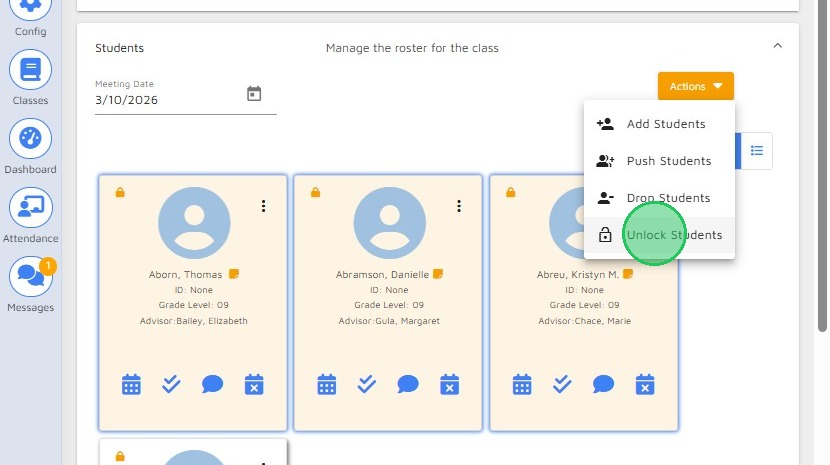
9. Select "Unlock Students" from the dropdown list.
10. Click "OK" button.
11. Notice that the lock icon has been removed from the student tile, indicating that the affected students are no longer locked from self-scheduling.
Comments
0 comments
Please sign in to leave a comment.